Davie Mac Tile – Trusted Tile Installation Experts
Your Space Deserves Craftsmanship That Lasts
At Davie Mac Tile, every project begins with care, precision, and a promise: to treat your home as if it were our own. With over 20 years of experience, we’ve built more than just tiled spaces—we’ve built trust, one project at a time.
Whether it’s a kitchen backsplash that catches the light just right or a bathroom floor that stands up to busy mornings, our focus remains the same: Quality Tile Craftsmanship in every square inch.
But it’s not just about tiles—it’s about creating spaces where memories are made, moments are shared, and every detail feels right.
This isn’t just work for us; it’s a craft we take pride in, a commitment to doing things well, and a reflection of values we’ve carried through every job for over two decades.
Tile Installation Services Built on Trust and Precision
Every tile project tells a story, and at Davie Mac Tile, we make sure it’s a story of craftsmanship, durability, and style. With over two decades of hands-on experience, we bring careful attention to detail to every service we offer.
Bathroom Tile Installation
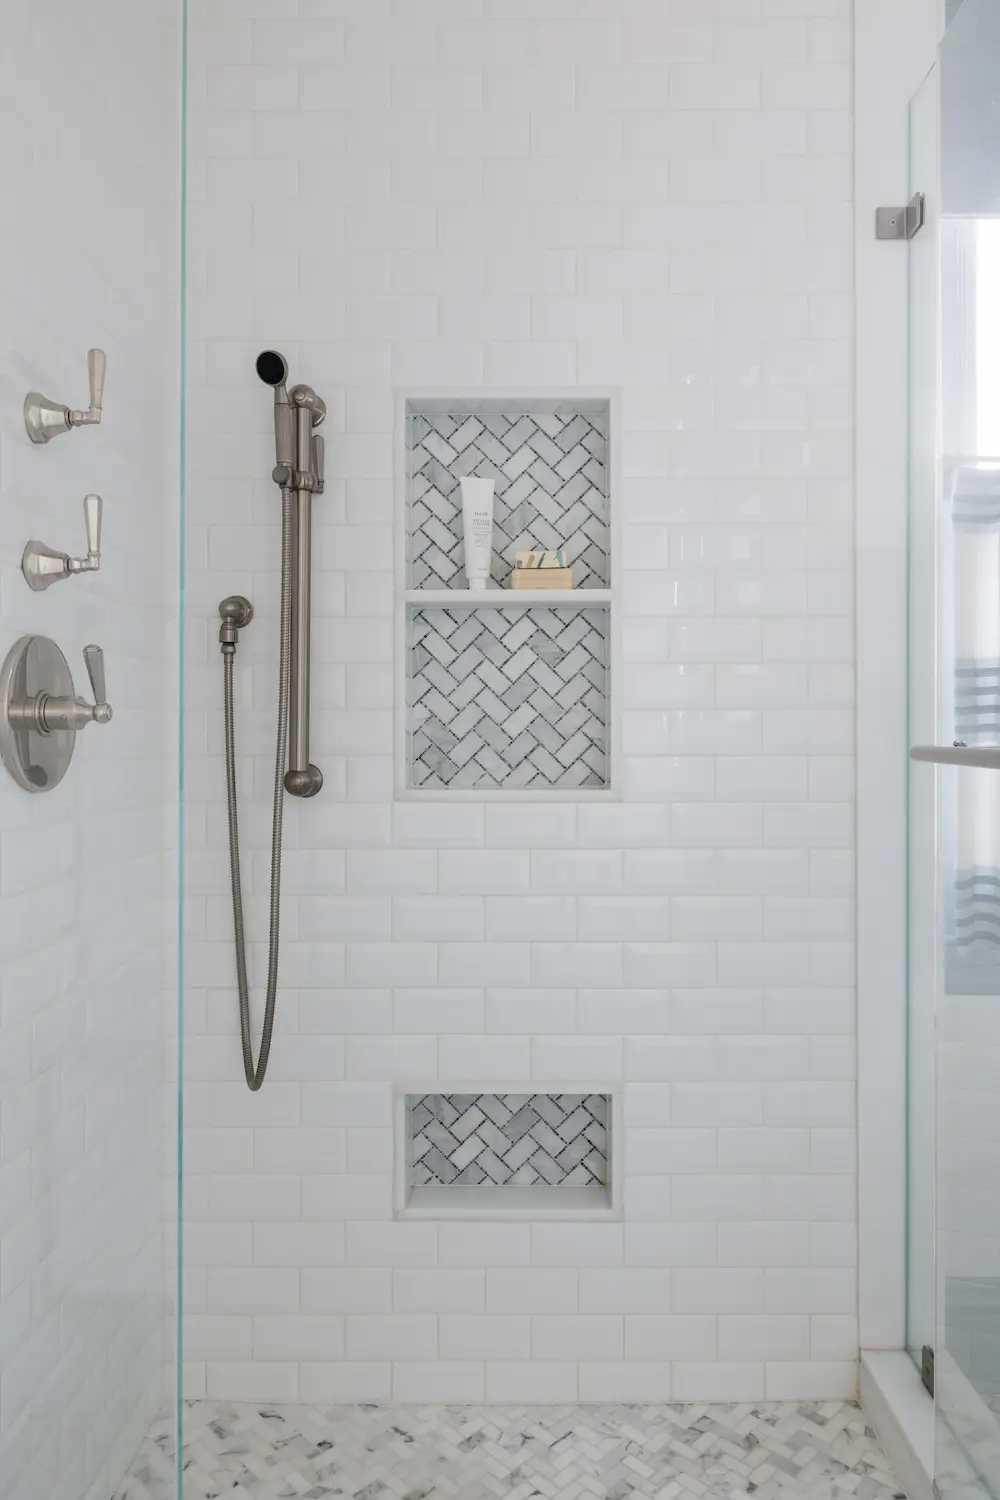
From shower walls to bathroom floors, our Bathroom Tile Installation service blends functionality with timeless style. Waterproofing, precision alignment, and expert grouting ensure your bathroom remains stunning and resilient for years to come.
Kitchen Tile Installation
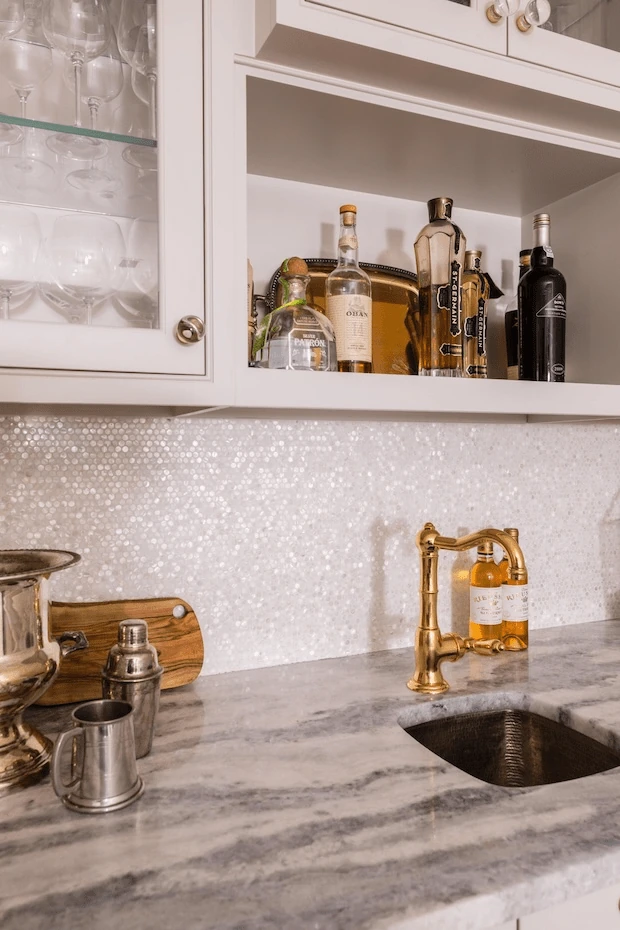
The kitchen is the heart of your home, and our Kitchen Tile Installation service ensures it shines. Whether it’s a sleek backsplash or a durable floor, every tile is laid with care, creating a space that feels both welcoming and stylish.
Custom Tile Designs
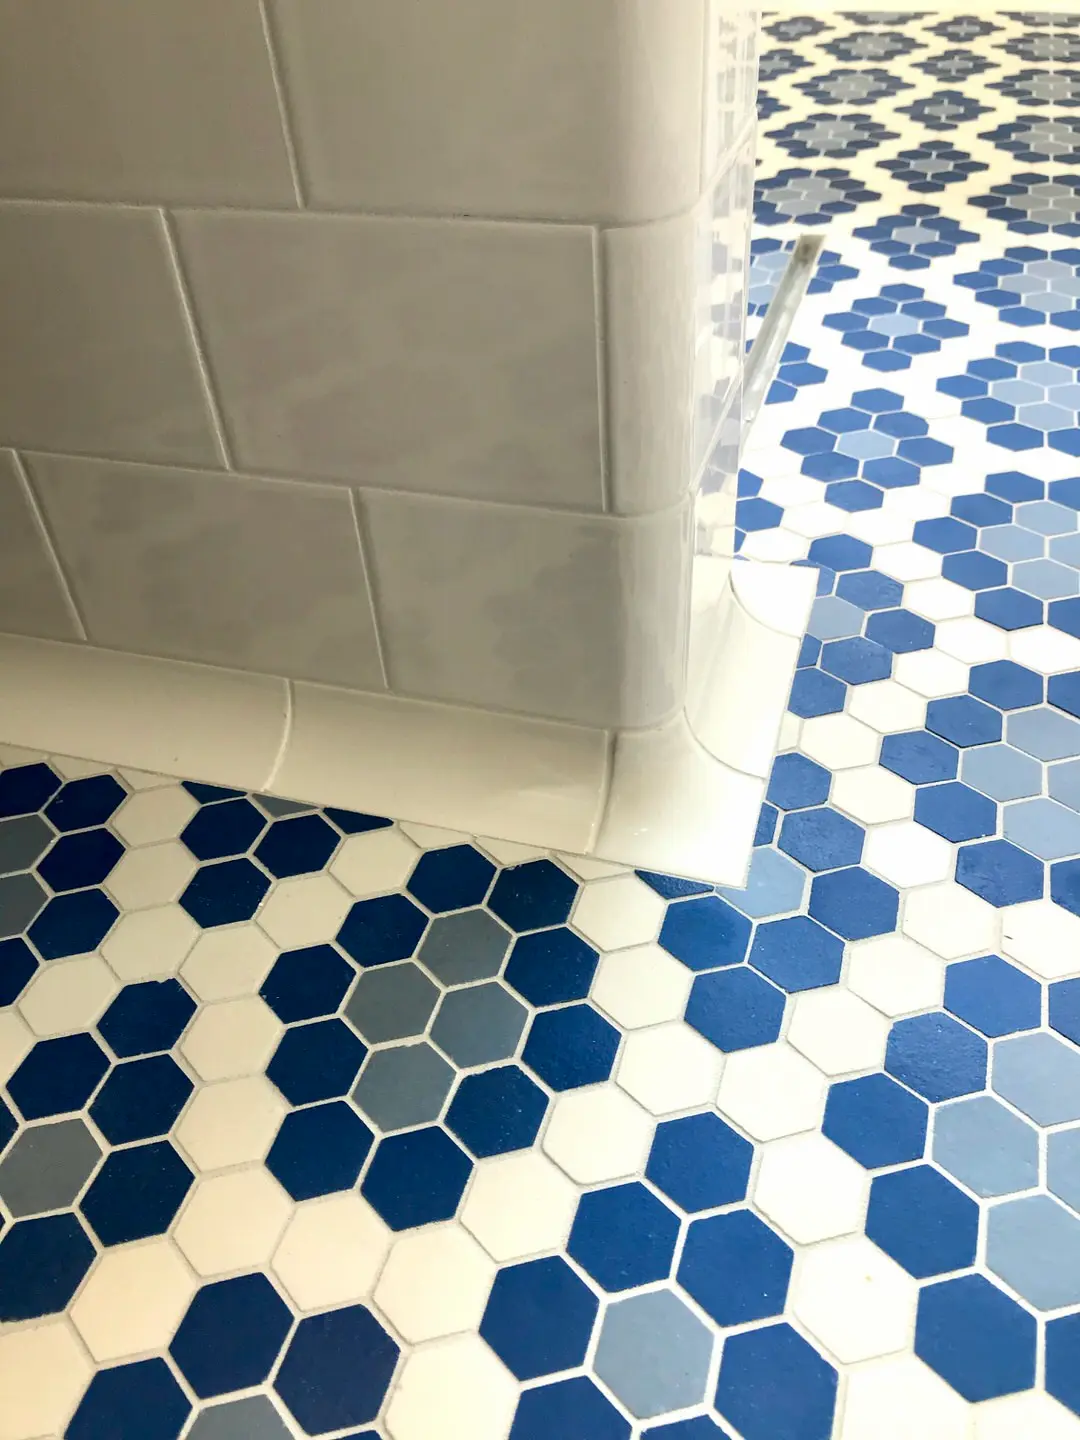
Looking for something unique? Our Custom Tile Designs service transforms your ideas into reality. From intricate mosaics to bold geometric patterns, we create layouts that reflect your vision and enhance your space.
Tile Repair and Maintenance
Cracked tile? Faded grout? Our Tile Repair and Maintenance service restores your surfaces to their original beauty. Regular maintenance keeps your tiles looking fresh and performing perfectly.
Every Tile, Every Space, Every Detail – Handled with Care
No matter the project size or complexity, we approach every job with the same goal: results that stand the test of time.
Expertly installed tile backsplash in a modern kitchen, designed and crafted by Davie Mac Tile.
Why Choose Davie Mac Tile?
Every tile we lay reflects more than just skill—it reflects our commitment to quality, trust, and care. At Davie Mac Tile, we’re not just about creating beautiful spaces; we’re about building lasting relationships with every client.
Experienced Tile Installer
With over two decades of hands-on experience, Davie Mac Tile has built a reputation for precision, reliability, and craftsmanship. From our early days in Florida to becoming a trusted name in the Greater Boston area, we’ve honed our skills across countless projects. Our commitment to ongoing education through partnerships with NTCA, Schluter, and Laticrete ensures we stay at the forefront of tile installation techniques. Read more about our journey and dedication here.
Professional Tile Contractor
We’re more than just installers; we’re partners in your project. From the first consultation to the final polish, you can expect clear communication, honest timelines, and a dedication to getting it right.
Tile Installation Experts
Whether it’s a kitchen backsplash, a custom mosaic, or a bathroom overhaul, we approach every detail with care and a sharp eye for perfection.
Built on Trust and Integrity
We believe in treating every home as if it were our own—no shortcuts, no compromises. Just hard work, honesty, and results we’re proud to stand behind.
“Davie may be the best contractor I’ve ever worked with. Very experienced, well-prepared, and focused on both the big picture and small details. A pleasure to work with. The execution was wonderful. Use this guy.”
— Christopher S., Jamaica Plain, MA
Your Project, Our Passion
Choosing Davie Mac Tile means choosing a team that values your trust, your vision, and your investment.
At Davie Mac Tile, our commitment to quality goes beyond words—it’s backed by industry-recognized certifications and affiliations that hold us to the highest standards in craftsmanship, safety, and customer care.
National Tile Contractors Association (NTCA)
As proud members of the NTCA, we stay informed about the latest industry standards, techniques, and best practices. This ensures every project meets or exceeds professional guidelines.
We’re proud to be BBB accredited, reflecting our commitment to transparency, accountability, and customer satisfaction. It’s more than a badge—it’s a promise to you.
Commitment to Excellence
Every tile we install isn’t just about aesthetics—it’s about following the right process, using the best materials, and treating your space with respect.
What Our Clients Are Saying
At Davie Mac Tile, every project is more than just a job—it’s a chance to leave a lasting mark in someone’s home. Our clients’ words reflect the care, precision, and dedication we bring to every tile we lay.
      EXCELLENT     Based on 69 reviews                    Posted on         Pankaj Mehta     Trustindex verifies that the original source of the review is Google. We have had Davie's tile working before two months, and the team did a remarkable  job to renovate  our standing shower.  He and his team including his wife Mari were very helpful in selecting tiles, grout, etc.   They finished the  job in 4 days, and there was no hassle.  The workers were very sincere, I highly recommend the team to do the job.  We were very pleased with the work.         Posted on         Zachary Kinton     Trustindex verifies that the original source of the review is Google. I had a great experience working with the team at Davie Mac Tile. Mari was incredibly responsive and helpful from initial engagement through to completion. Junior and his team were great on site and the installation looks amazing. Very happy with the result and will definitely use them again for future work.         Posted on         Daniel Jenks     Trustindex verifies that the original source of the review is Google. Davie Mac worked as a subcontractor for our master bathroom remodel, and they installed the new tile for the bathroom floor and shower. The final product looks fantastic, and we are very happy with the results. They also worked very efficiently, and we were surprised how quickly they were able to complete the project. I highly recommend working with them and would certainly use them again for a future project.         Posted on         Kristi Carlson     Trustindex verifies that the original source of the review is Google. From the first phone call to the final walk‑through, the communication with Davie Mac Tile was exceptional. They responded quickly to my questions, kept me informed of the schedule, and made sure I understood each step of the fireplace tile installation. Highly recommend them to anyone looking for a reliable tile contractor.         Posted on         Nancy Foley     Trustindex verifies that the original source of the review is Google. The BEST experience working with this company! From owner , office customer service , and installer everyone I worked with was GREAT!  Job completion was earlier than anticipated. The installer cleaned up every day!!! You’re crazy if you don’t use this company!  Sooo happy I found them!         Posted on         Suzanne Otte     Trustindex verifies that the original source of the review is Google. We found Davie Mac Tile while searching for tile and flooring installation for a bathroom we were renovating. The experience with the Davie Mac team was excellent. Our project was managed well and communication was consistent and thorough. We particularly appreciated the time Davie Mac took to visit our bathroom pre-renovation, helping us to conceptualize and proceed with our ideas. Our project manager, Mari, was very well organized and knowledgable about design and timelines for our tile and flooring installation. The Davie Mac crew was timely, detail oriented, and the craftsmanship was excellent. I would recommend Davie Mac to anyone who appreciates professionalism, follow-through, and careful attention to workmanship. We’re glad we chose Davie Mac!         Posted on         Tanya Whitlow     Trustindex verifies that the original source of the review is Google. They did a wonderful job, we are very happy with our new floor and backsplash!  We did not realize how unsturdy our old floors were until the new one was in - the quality of work seems very good. Communications was excellent!  Thank you!         Posted on         Steve Calitri     Trustindex verifies that the original source of the review is Google. After 10 years, our tile shower began leaking due to what turned out to be a substandard original installation. We were frustrated and concerned about water damage, but after some research we found Davie Mac Tile.

The Project Manager, Mari, was fantastic! She was not only responsive and organized but also showed up in person multiple times to review progress, answer our questions, and ensure everything was being done to a high standard.

The team removed the old tile work, addressed the underlying water damage, and rebuilt the shower with the proper waterproofing techniques. The finished result looks great and we have confidence that we won’t have the same issues as we did with the original work. The same goes for the great job done repairing our water damaged living room ceiling.

Davie Mac’s crew were extremely professional and courteous. They kept the workspace clean throughout the project and were very meticulous in leaving the space cleaner than they found it. (They even cleaned up some bad painting around the shower trim that was done by the homeowners!)

We highly recommend Davie Mac Tile! My husband and I would definitely re-hire them for future projects!         Posted on         Hans USA     Trustindex verifies that the original source of the review is Google. This could not have been a better experience. From the first contact with Mari to the end of the job, everything was seamless. The quality of the work was first rate. The installers were polite, professional, and highly skilled.              Verified by Trustindex  Trustindex verified badge is the Universal Symbol of Trust. Only the greatest companies can get the verified badge who has a review score above 4.5, based on customer reviews over the past 12 months. Read more
The Stories Behind the Tiles
Every review tells a story of trust, craftsmanship, and satisfied homeowners. At Davie Mac Tile, we approach each project with the same dedication, knowing that every detail matters.
Ready to Transform Your Space with Expert Tile Installation?
When it comes to creating beautiful, lasting tile installations, Davie Mac Tile is the name homeowners and businesses trust. From kitchen backsplashes to bathroom renovations and custom tile designs, every project is handled with care, precision, and dedication.
Let’s turn your vision into reality—one tile at a time.
Proudly Serving the Greater Boston Area and Nearby Communities
At Davie Mac Tile, we proudly serve homes and businesses across the Greater Boston region. Explore the full list of areas we serve and find expert tile installation near you on our Service Area page. Our team brings expert craftsmanship and care to every space we tile, no matter the size or style of your project.
A commitment to honesty, integrity, and excellence
Reach out to us today to schedule your consultation. Let’s bring your vision to life with the expertise and precision that Davie Mac Tile is known for.
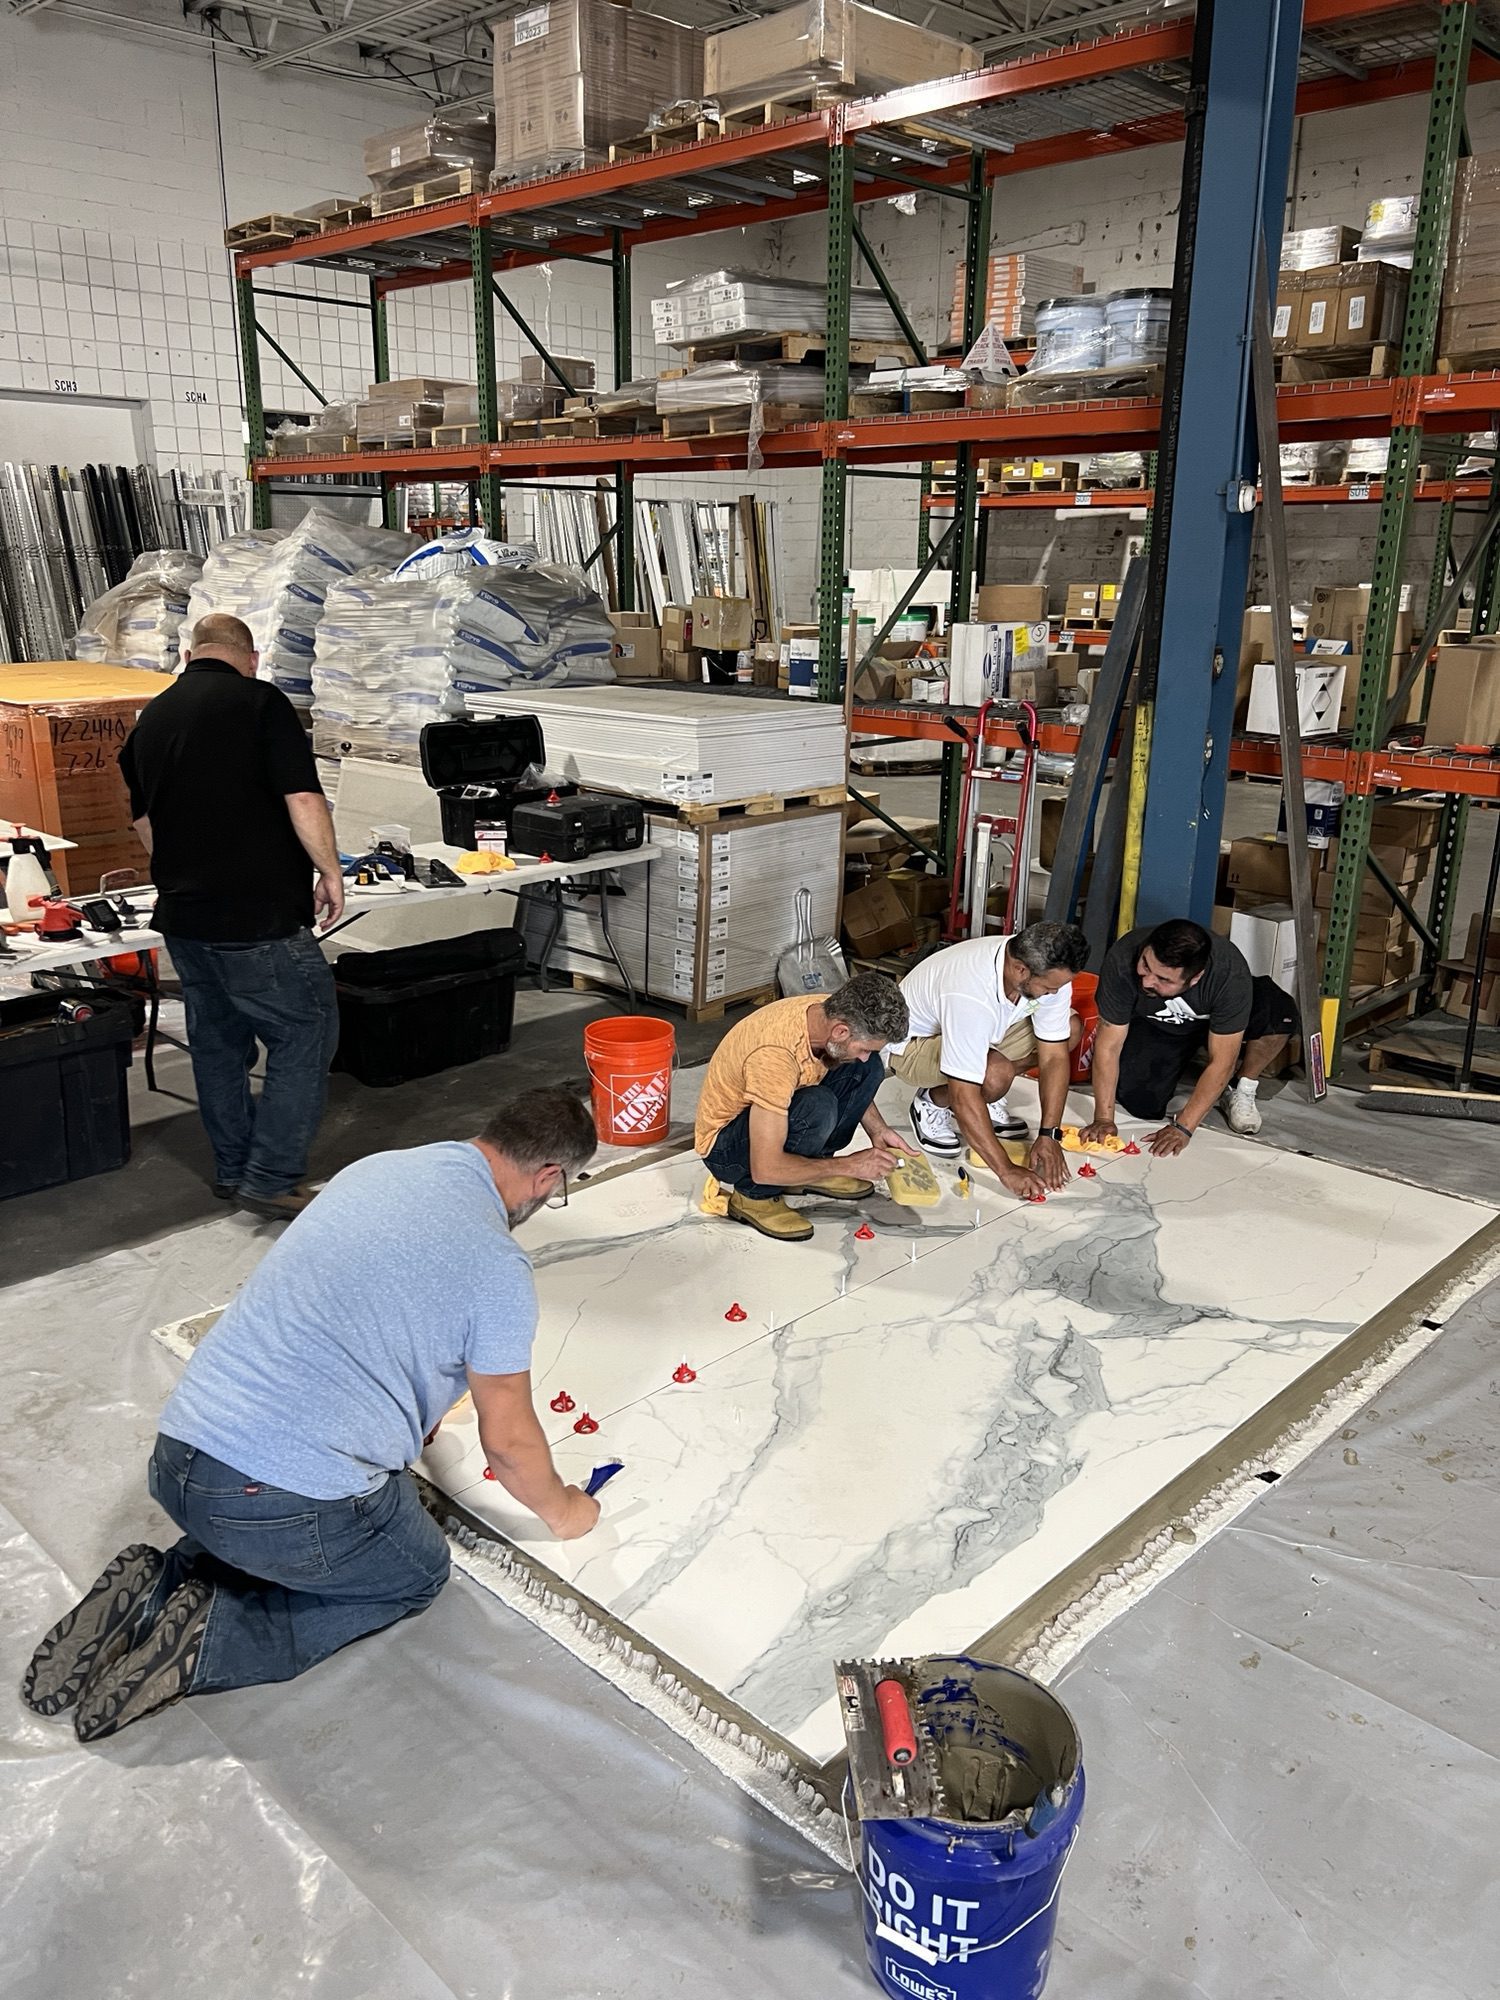
Large porcelain tiles — sometimes called porcelain slabs — look incredible when they’re installed right. Fewer grout lines, a clean modern look, and a finish that holds up for years. But these aren’t regular tiles. They’re bigger, heavier, and a lot less forgiving. If the installer doesn’t know what they’re doing, you’re looking at cracked… Read More
Tile drenching is taking off in 2025, wrapping floors, walls, and even ceilings in the same tile to create unified, tranquil rooms. This approach brings a spa‑like feel to bathrooms, kitchens, and mudrooms—all with fewer grout lines and simpler maintenance. Here’s how pros can nail it. What Is Tile Drenching? Tile drenching means covering every… Read More
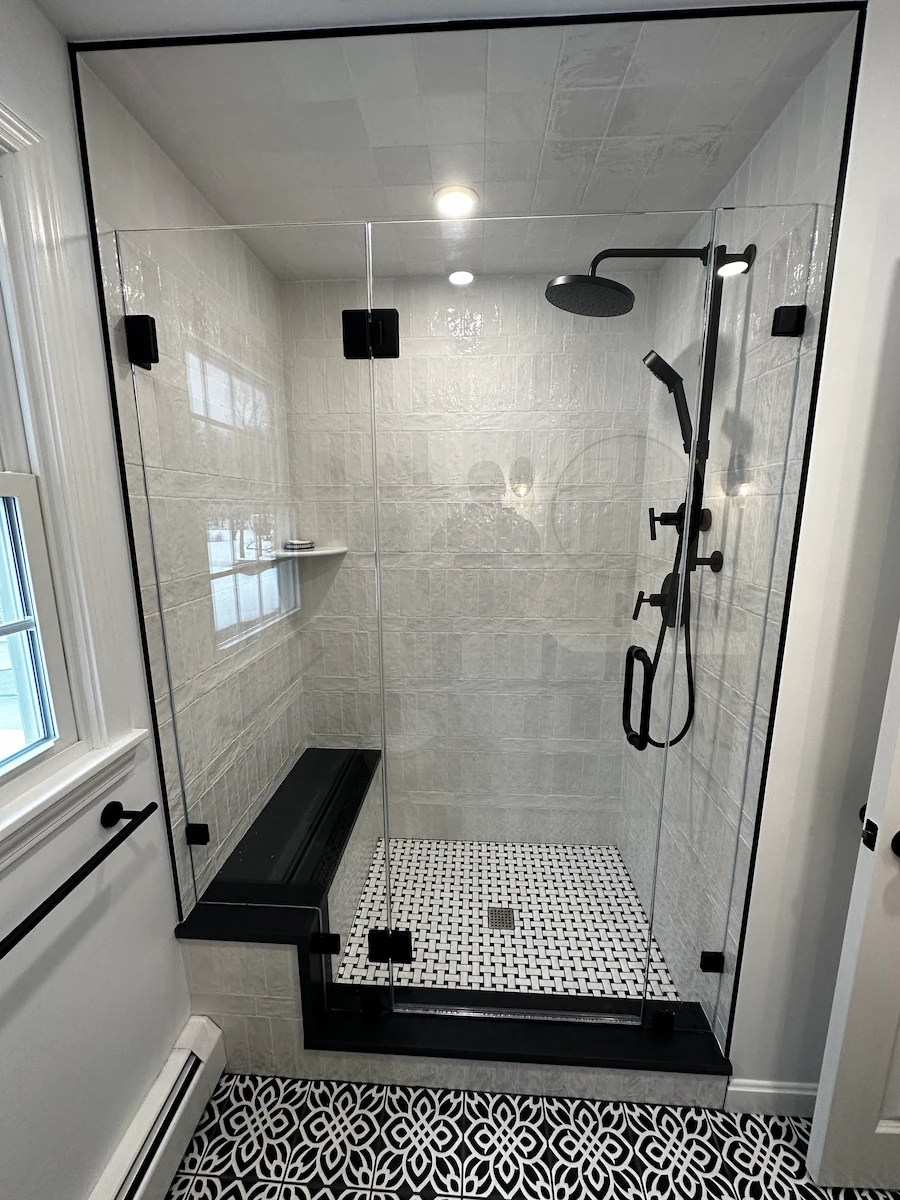
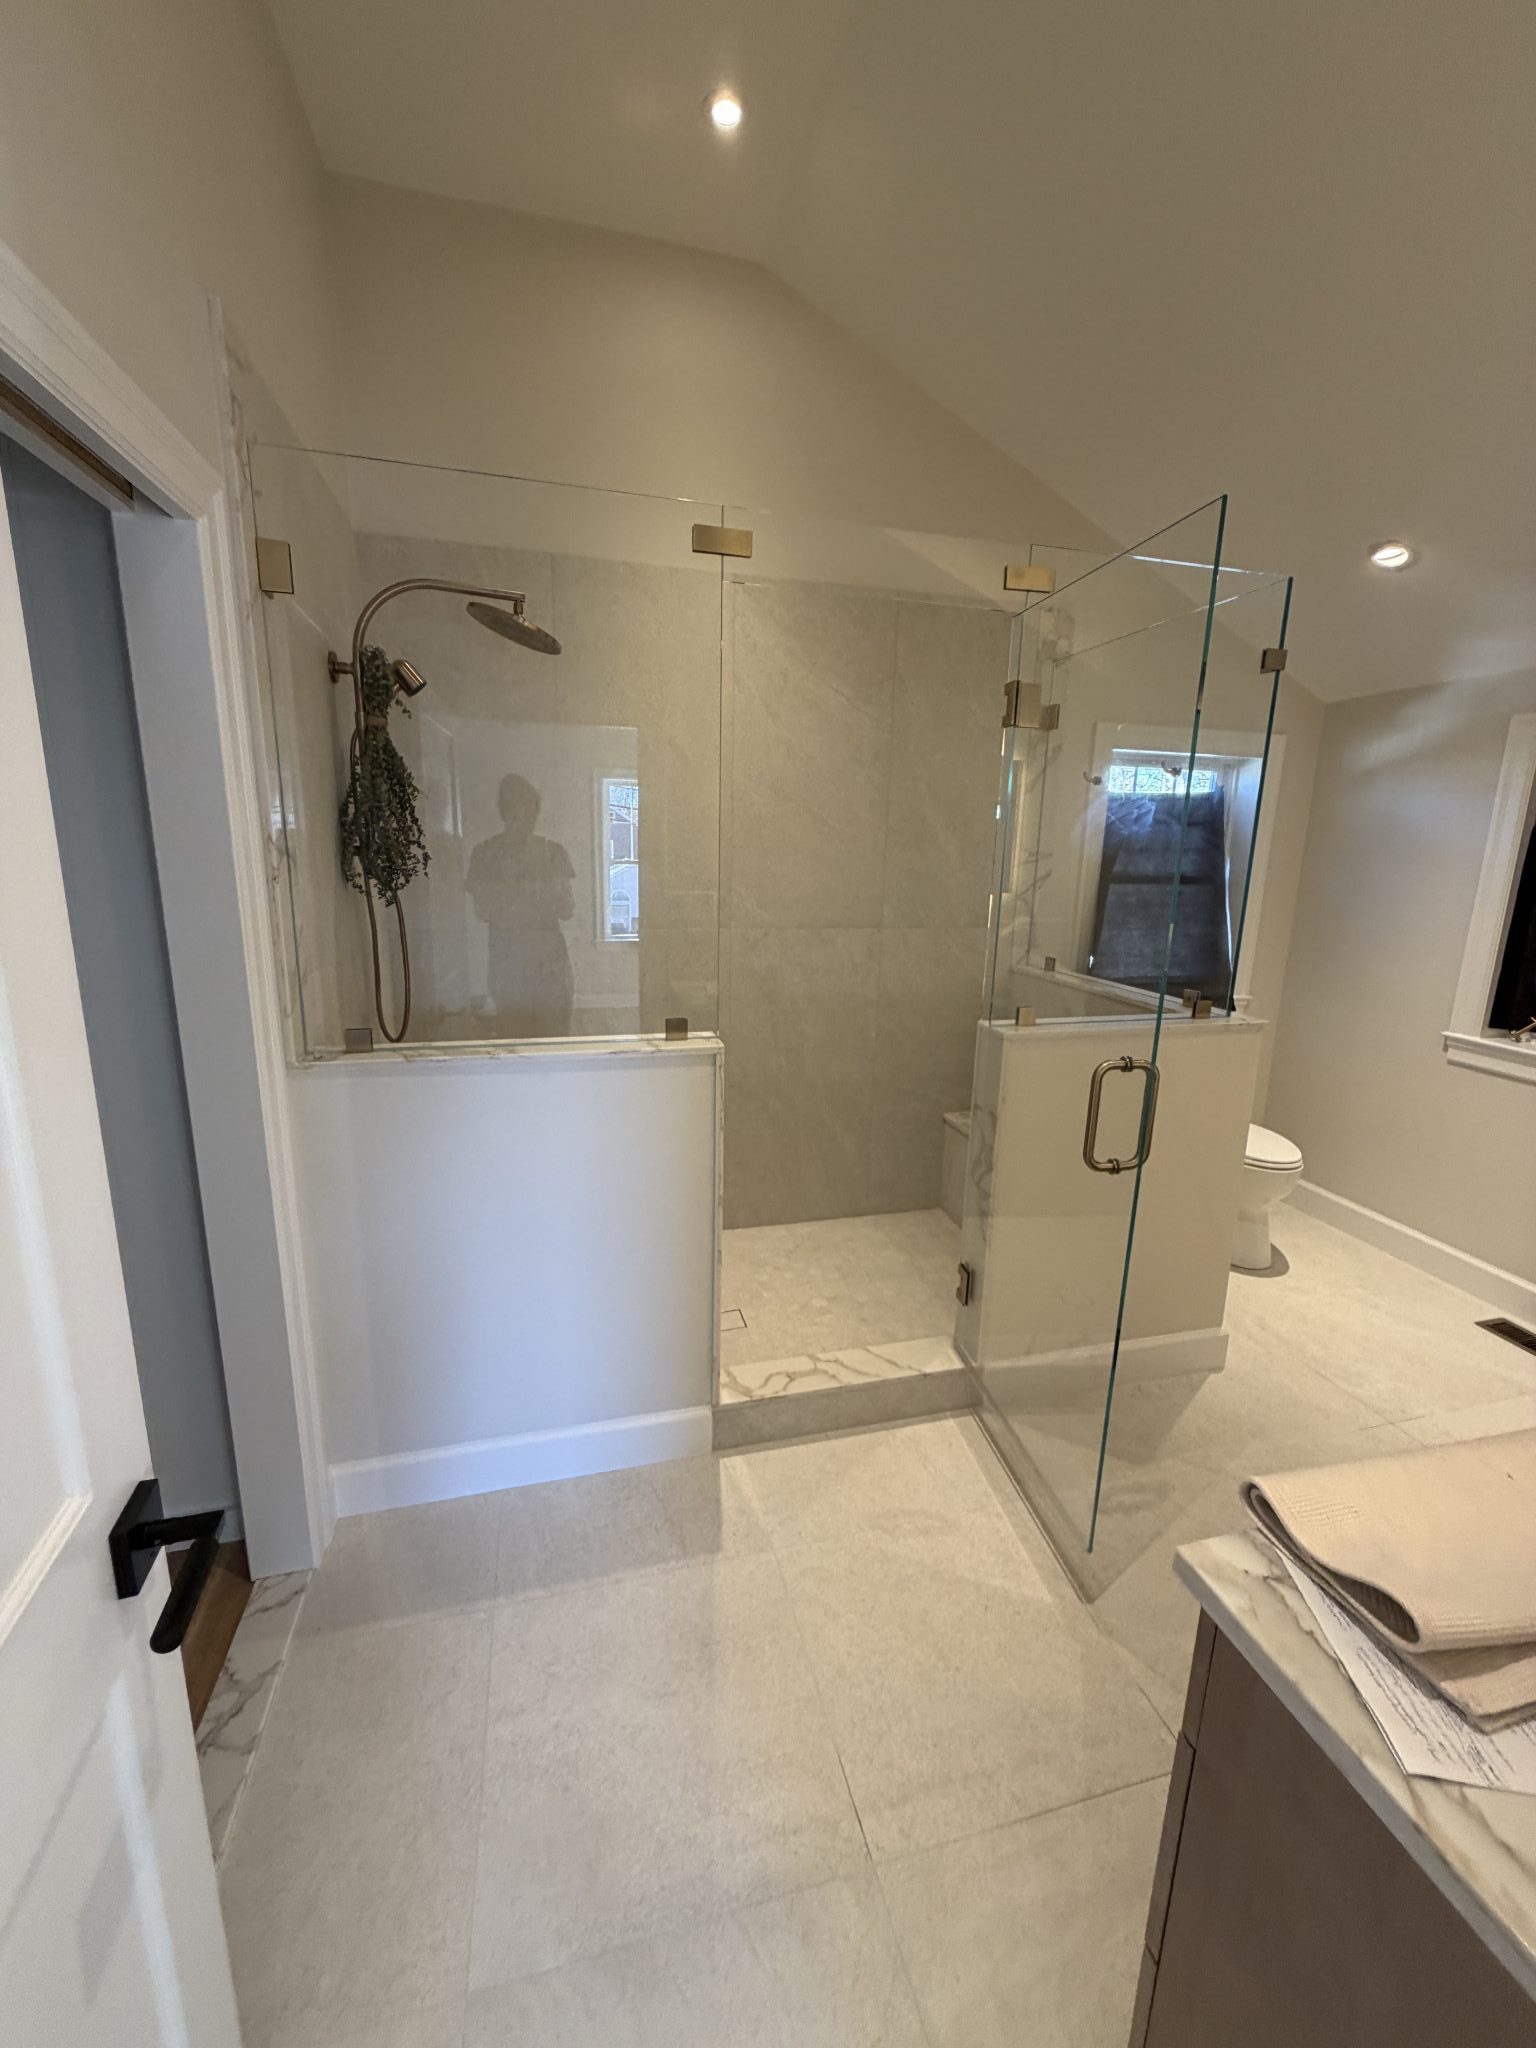
Some showers age better than others. This one had been around for nearly 30 years, and while it had held up okay, it was clearly ready for a change. The original layout featured dated blue tile, a bulky glass door, and a window right inside the shower area. The space needed more than a facelift—it… Read More